Travel App Icons for Clean, Professional Design Work
Every digital project—whether a mobile app, a website, a printed brochure, or a social media campaign—needs visual elements that communicate quickly and clearly. Icons are among the most efficient tools for that job. When you work with a set like Travel App Icons, you are not just downloading graphics; you are adding a flexible, scalable asset that can slot into almost any stage of your creative or business workflow. This article walks through what this icon set is, where it fits in real projects, and how to get the most out of it without wasted time or effort.
What Travel App Icons Are and Where They Belong in Your Process
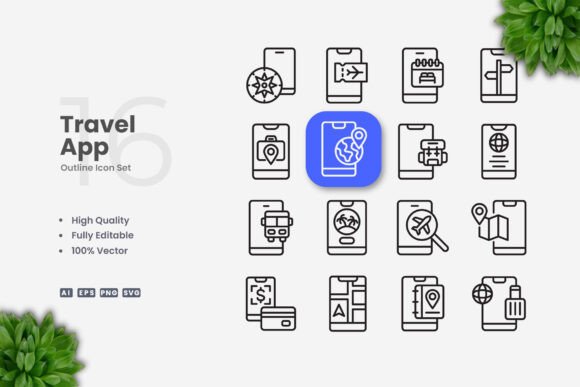
Travel App Icons is a collection of 100 vector icons designed with a simple, clean aesthetic. The set is built around travel-related imagery—planes, suitcases, maps, landmarks, tickets, and similar symbols—but the style is neutral enough to work in many non-travel contexts. Think directional cues, location markers, transportation icons, or even abstract representations of movement and exploration.
These icons are delivered in multiple formats: source AI, EPS version 10, SVG, and PNG with transparency. That means you can open them in vector software like Adobe Illustrator or CorelDRAW, resize them without losing quality, change colors, adjust stroke weights, and combine them with other design elements. The PNG files give you a quick drop-in option when you don't need to edit the source.
In a typical workflow, you would use this set during the asset preparation phase of a project. That is the stage where you gather, create, or refine the visual components before assembling the final layout. But you can also use them during a project for quick prototyping, or after launch to update visuals in marketing materials, blog posts, or user interfaces.
Before the Project: Planning and Asset Selection
Before you start designing, you need to decide what visual language your project will speak. Clean, simple icons are often the safest choice because they do not compete with content for attention. They support the message instead of overpowering it.
When evaluating Travel App Icons for a new project, open the Readme.txt file first. It contains the basic usage instructions and a breakdown of the included formats. Then browse the SVG or PNG previews to see which icons match your content categories. Because the set is travel-themed, it works naturally for:
- Travel booking websites or apps
- Tourism brochures and flyers
- Infographics about destinations or itineraries
- Social media posts for travel agencies or bloggers
- Educational materials about geography or culture
- Wayfinding signage for events or campuses
- Print materials like posters, banners, and packaging
The preparation step is straightforward: decide which icons you need, note the ones you might want to customize, and confirm that the file formats align with your design software. Since the set includes both editable source files and ready-to-use PNGs, you can pre-plan for two parallel workflows—one for quick deployment and one for detailed customization.
During the Project: Integration and Customization
Once your project is underway, you will likely need to adjust icons to fit a specific color palette, stroke thickness, or size. This is where the vector formats shine. Open the AI or EPS file in Adobe Illustrator or CorelDRAW, and you have full control over every element.
Here are practical ways to integrate the icons into common tasks:
For a mobile app interface: Import the SVG icons directly into your design tool (Figma, Sketch, XD, or similar). Because the icons are vectors, they scale perfectly for different screen sizes. Adjust the stroke weight to match the app's typography—thinner strokes for light, modern interfaces, thicker strokes for bolder, more playful designs. Change the fill color to match your brand palette using the editable stroke feature.
For a website or landing page: Use the PNG files for quick placement during prototyping. When you finalize the design, replace them with SVG code or linked SVG files to keep the site lightweight and responsive. The transparency in the PNGs makes them easy to overlay on colored backgrounds without awkward white boxes.
For print materials like flyers or posters: Open the EPS file in CorelDRAW or Illustrator. Resize the icon to any dimension—from a small bullet point to a large graphic—without worrying about pixelation. Change the stroke color to match your print ink colors (CMYK). The clean, simple style reproduces well even at small sizes, which is important for dense content like brochures or infographics.
For social media graphics: Drag the PNG icon directly into Canva, Photoshop, or a similar tool. Because the icons are simple, they work well as overlay graphics on photos, as list bullets, or as part of a branded template. You can also batch-resize them for different platform formats by opening the SVG in a browser and adjusting the viewport.
One of the biggest time savers is the drag-and-drop nature of the files. You can copy icons from the source document and paste them directly into your working file, preserving the vector properties. That eliminates the need to export each icon separately.
After the Project: Updates, Scaling, and Long-Term Use
After you have launched a website, printed a campaign, or published an app, the Travel App Icons set continues to be useful. Marketing materials need periodic updates—new social media banners, revised brochures, seasonal promotions. If you have kept the source files organized, you can quickly reuse, recolor, or remix the same icons without starting from scratch.
Because the set includes 100 icons, you are unlikely to exhaust the options in one project. You can use different icons for different campaigns, maintaining visual consistency across touchpoints. The uniform style means that all icons look like they belong together, which strengthens brand recognition over time.
For long-term use, consider these organizational tips:
- Keep the original AI and EPS files in a dedicated asset library on your cloud storage or local drive.
- Create a subfolder for customized versions—for example, icons recolored for different brands or themes.
- Export frequently used icons as separate SVG files for easy web integration.
- Document in a spreadsheet which icons you used in which projects, so you do not repeat the same combination too often.
The editable stroke feature is especially valuable for long-term projects. As your brand evolves and your visual guidelines change, you can update all icons by adjusting the stroke weight or color in the source file and re-exporting. That saves hours of manual rework.
How This Icon Set Interacts with Other Tools and Resources
Travel App Icons does not exist in isolation. It works best when combined with other design assets and tools. For example:
- Typography: Pair the icons with a clean sans-serif font for a modern, minimal look. The simple icon style matches well with neutral fonts like Inter, Lato, or Open Sans.
- Photography: Overlay icons on travel photos for social media. Use a semi-transparent PNG or a white icon on a darker image area.
- Color palettes: The default stroke is likely black or a neutral color. Change it to your brand's primary or accent color. Because the design is clean, even bright or muted colors work without looking cluttered.
- Other icon sets: If you need icons outside the travel theme (like finance, health, or technology), you can mix Travel App Icons with other vector sets as long as the stroke weight and style are consistent. The clean, simple aesthetic is common enough that blending is usually seamless.
- Prototyping tools: Import the SVG files into Figma or Sketch for interactive prototypes. The icons will scale correctly and respond to component properties like color overrides.
From a workflow perspective, the icon set acts as a central asset that connects multiple stages: planning, design, development, and publishing. You are not purchasing a one-use graphic pack; you are adding a reusable component to your creative toolkit.
Practical Implementation Tips for Professionals and Creators
Here are some concrete ways to integrate Travel App Icons into your daily work, regardless of your role:
For bloggers and content creators: Use the icons as visual headers for different sections of a travel guide article. A suitcase icon next to "Packing Tips," a map icon next to "Routes," and a ticket icon next to "Costs" makes the content more scannable. The PNG files drop directly into your blog platform.
For marketers and small business owners: Create a set of social media templates with consistent icon usage. For example, use a plane icon in every Instagram story that announces a new destination package. Over time, your audience will associate the icon with that type of content.
For educators and publishers: Build infographics that explain travel safety, cultural norms, or itinerary planning. The simple icons keep the infographic from looking overcrowded. Print them in a workbook or use them in a digital presentation.
For freelancers and designers: When you need to quickly mock up a concept for a client, pull icons from this set to populate the wireframe. Because they are clean and recognizable, clients will focus on the layout and structure rather than getting distracted by placeholder images.
For productivity-minded users: Keep a folder of your 10 most-used icons from the set on your desktop. Anytime you need to create a quick document, presentation, or note, you can drag them in without opening your full design software.
Quality Control and Consistency Considerations
Using a pre-made icon set like Travel App Icons brings built-in consistency. All 100 icons share the same stroke style, corner shapes, and visual weight. That is hard to achieve when you draw icons from scratch or mix different free resources.
Before deploying the icons, do a quick quality check:
- Open the vector file and check that all strokes are aligned and closed properly. The description says "high quality design" and "editable stroke," so this should be fine, but it is always worth verifying.
- Test the icons at both small and large sizes. Clean designs tend to hold up well, but verify that details are legible at 16x16 px if you plan to use them in app interfaces.
- Check transparency in the PNGs. Place one on a dark background to ensure no unwanted white edges appear.
- If you change the stroke weight, do it globally in the source file to maintain uniformity. Changing individual icons manually can lead to visual inconsistency.
The 100% customizable nature of the set means you are in control of quality. If an icon needs a slight adjustment—a different angle, an extra element, a simplified version—you can edit it directly. The source file is your master copy.
Usability Across Different Platforms and Outputs
One of the strongest points of Travel App Icons is the range of included formats. The AI and EPS files are standard for print and professional design. The SVG format is ideal for web and modern app development. The PNG with transparency is the easiest option for quick use in documents, presentations, and social media.
This variety means you do not need to convert files or worry about compatibility. If your workflow involves multiple team members using different software (some on Illustrator, others on Canva, some on Sketch), everyone can use the format that works best for them. The shared visual style ensures that the final output looks consistent regardless of who handled the asset.
For team collaboration, store the AI or EPS source file in a shared drive. Each team member can export the icons they need in the format required for their part of the project. The drag-and-drop ease further reduces friction when moving icons between documents.
Final Observations on Process and Value
Travel App Icons is not a complicated product. It is a straightforward, well-prepared set of vector icons that serves a clear purpose: giving you adaptable, professional visuals without the overhead of designing from scratch. The value comes from how you integrate it into your process—whether you use it at the planning stage to define a visual direction, during execution to populate wireframes and layouts, or after launch to maintain consistent branding across materials.
When you treat an icon set as a reusable asset rather than a one-time download, it pays for itself many times over across multiple projects. The 100 icons provide enough variety for most travel-related or location-based work, and the clean style ensures they never look dated. With the ability to edit stroke weight, change colors, and scale without limits, you have a resource that adapts to your workflow rather than forcing you to adapt to it.
For professionals, creators, and businesses who need reliable visual assets that work across print, web, mobile, and social media, a well-made vector icon set like this one is a practical investment. It removes a common bottleneck—finding or creating simple, consistent graphics—so you can focus on the actual project work that matters.